
Video analysis allows dancers to see exactly what they’re doing, identify areas for improvement, and track their progress over time.
Why Video Analysis Works
Watching yourself dance on video can be eye-opening. What feels one way when you’re dancing might look completely different when you see it on screen. Video analysis bridges the gap between how dancers think they’re moving and what’s happening. It’s a chance to see mistakes and understand what needs adjusting.
Visual Learning: Many dancers are visual learners. Seeing themselves on video helps them understand the corrections you give and visualize the adjustments they need to make. It’s one thing to feel a mistake, but seeing it is often more impactful.
Immediate Feedback: Video analysis provides instant feedback. Instead of waiting for feedback, dancers can watch the playback and possibly spot issues independently, making it easier to make corrections and apply them immediately.
Tracking Progress: Recording practice sessions and social dances allow dancers to see their growth over time. This is motivating and helps pinpoint what’s working and what needs continued focus.
How to Incorporate Video Analysis into Your Teaching
Here’s how to get started.
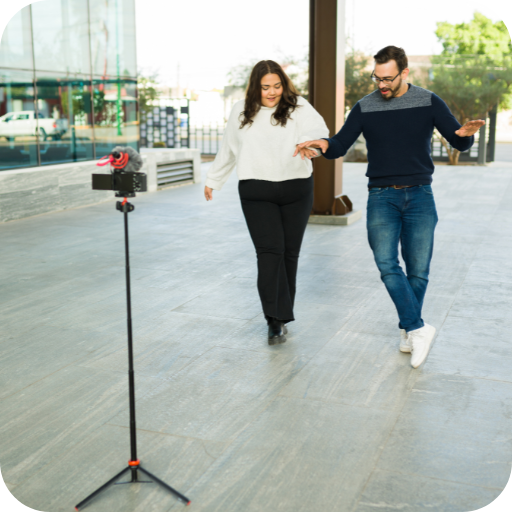
Set Up for Success
Before you start recording, ensure you have the right setup. A simple tripod and a smartphone or tablet are all you need to capture quality video. Choose a space with good lighting and enough room for dancers to move comfortably. Optionally, you could buy an inexpensive wide-angle lens that can clip over your phone camera.
Position the Camera: Position your camera at an angle that captures the entire dance area. Avoid placing it too close, as this can cut off footwork or other details. A wide shot is usually best for capturing the full scope of the movement.
Lighting Matters: Good lighting makes a big difference in video clarity. The space should be well-lit so dancers can see their movements and make accurate assessments.
Test the Setup: Do a quick test recording to ensure the camera is capturing everything you need. Adjust as necessary before starting your analysis session.
Record Key Moments
Video analysis is practical when practicing new moves, social dancing, or performing drills. Recording these moments allows dancers to review their performance in a low-pressure setting and see how they apply their learned skills.
Highlight Specific Skills: Focus on specific skills or techniques you’re working on in class. For example, record a sequence of spins, connection drills, or musicality exercises. This targeted approach makes the analysis more focused and productive.
Keep It Short and Sweet: Short clips are often more helpful than long recordings. A quick 30-second to 1-minute clip can highlight much detail without overwhelming the dancer with too much information.
Review Videos with Your Students
After recording, set aside time to review the videos with your students. If you’re analyzing common patterns or techniques, this can be done one-on-one, in small groups, or even as a whole class.
We use a tool called CoachView. It’s available on the Apple Store or Google Play for $9.99. It lets you replay in slow motion and compare two videos side by side. It’s so worth it.
Provide Constructive Feedback: When reviewing videos, provide constructive, specific feedback. Point out what’s working well before moving on to areas that need improvement. Use positive language to keep the experience encouraging.
Use Pausing and Slow-Mo Features: Use pause, slow-motion, and frame-by-frame features to break down movements. This allows you to highlight specific moments, like when a lead is unclear or a follow’s timing is off.
Encourage Self-Analysis: Ask students what they see in the video before offering your feedback. This encourages them to think critically about their dancing and become more self-aware.
Share Videos for Home Practice
Recording videos isn’t just for in-class analysis—it’s a great resource for dancers at home. Sharing videos with students allows them to review at their own pace, practice adjustments, and come back to class more prepared.
Create a Private Group or Channel: Use platforms like YouTube (private or unlisted links), Google Drive, or a private Facebook group to share videos with your students. To maintain privacy, restrict access to your students.
Offer Analysis Tools: Encourage students to use free video analysis apps like Coach’s Eye or Hudl Technique that allow them to slow down footage, add annotations, and even compare side-by-side videos.
Set Practice Goals: Along with sharing the video, provide specific practice goals or drills based on what was reviewed. This turns the video into an actionable learning tool rather than just a playback.
Use Before-and-After Comparisons
One of the most impactful uses of video analysis is comparing “before and after” footage. Record a dancer’s performance at the start of a lesson or session and again after practicing the corrections. This side-by-side view can be incredibly motivating and show real, tangible progress.
Highlight Improvements: Use comparisons to show how much the dancer has improved, even if the changes are subtle. This reinforces the effectiveness of the feedback and keeps dancers motivated to keep working.
Identify Persistent Challenges: Comparisons also help identify persistent challenges. If certain issues continue to show up, it gives you and the dancer a clear direction on what to focus on moving forward.
Best Practices for Effective Video Analysis
To get the most out of video analysis, keep these best practices in mind:
Keep It Positive: Video analysis can feel vulnerable, especially for newer dancers. Keep feedback positive and constructive, emphasizing growth and potential rather than just critiquing mistakes.
Make It a Regular Practice: Incorporate video analysis regularly, not just as a one-off. The more frequently students engage with this tool, the more comfortable and effective it becomes.
Create a Safe Space: Ensure that video analysis sessions are safe, supportive, and encouraging. Make it clear that the goal is improvement, not perfection, and that every dancer has strengths to build on.
Respect Privacy: Always ask permission before sharing videos publicly or with others in the class. Respect dancers’ comfort levels and only use videos for analysis unless otherwise agreed.
Final Thoughts on Using Video Analysis in Teaching
By showing students exactly what’s happening in their dancing, you give them the tools they need to self-correct, build awareness, and improve their ability to self-diagnose. So grab that camera and hit record!